Saturday, February 18, 2023
Birds & Blooms
Another card using the Heartfelt Creations bird cage die. I turned it into a shaped card & covered it with the beautiful papers & handmade Lily’s .. I do love this collection…
Monday, February 6, 2023
Birdcage card
Trying to get back into posting again, I’ve had no mojo but it feels wonderful to be making something & I have another card in the works. Thanks for stopping by.
Janie
Saturday, February 4, 2023
Thursday, February 2, 2023
Tea Time Easel Card
I’m sharing an easel card I made awhile ago. I used the papers, stamps & dies from Heartfelt Creations Tea Time collection … Added a handmade rose flower & some leaves to match. I forgot how much I enjoyed posting. You can click on an image if you want to enlarge them.
i know it’s been a long time but I Hope some of you are still following me.
Hugs, Janie
Tuesday, January 12, 2021
Desk Set
Hello my friends & family, I’ve been absent so long they shut off my blog. I just reactivated it & am ready to post again if only I can remember how it’s done. I’ve been using or rather PURCHASING” a lot of Heartfelt Creations papers, stamps & dies ...Now its time to share my newest addiction with you.
Saturday, December 16, 2017
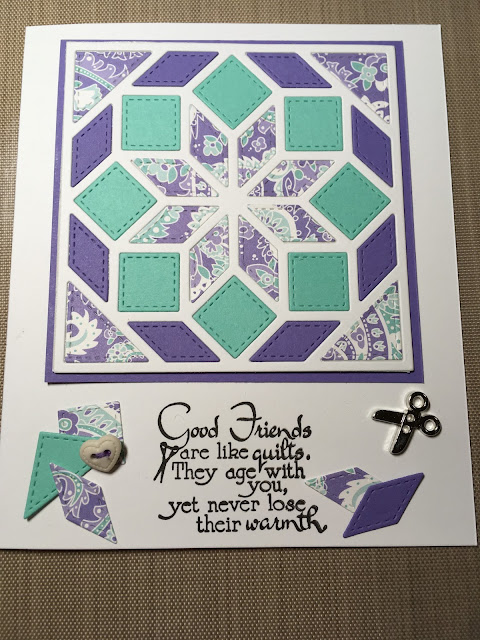
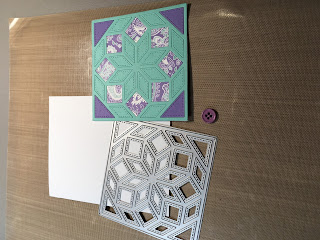
Quilt Card
Wednesday, June 5, 2013
A Mother's Love
I've used one of the many adorable images found at The Paper Shelter called "My Sweet Mommy".
If you use any of their images the winner will get a generous $30 gift certificate to spend buying these wonderful digis. If you choose to use another image you can still win 3 digis of your choice. So grab your supplies & come join us ... We love to see what you can create.
Wednesday, March 27, 2013
Freshly Harvested
Good morning on this beautiful day. I know a lot of you are still getting snow & that nasty cold stuff but here in sunny, warm Tucson, AZ it’s been 80 most days for quite awhile. I must say I’m loving it !!!
My card today is for the “A” team challenge #105 at “The Paper Shelter” for the theme "anything goes". I hope you'll grab your crafting supplies & join us for a chance to win $30 to spend at the their shop if you use one of their images or 3 images of your choice if you use any other image.
I’ve used one of the new digi images called “Freshly Harvested” & I think she’s just adorable. She reminds me of several of my grand daughters out picking a few veggies or a pretty bouquet of flowers they’ve grown. For my pretty background paper I printed out a sheet from their digi pack called “Distinguished” & chose my Copic colors from it to color up this sweet little girl.
Copics used :
Hair Y000 - Y00 - Y21
Scarf & shorts - BG75 - 72 - 000
Top & Basket - E44 - 43 - 42

I used some new Cheery Lynn flower dies on this card & am really enjoying playing with them. They are so simple to turn a plain piece of paper into some lovely flowers of many different kinds & any color you need to match your project.
I chose to make 2 different sizes of the Fringe flower out of cream card & then swiped a little tan ink on the tips to make it go with the Coffee Filter Daisy I made to match. This was the most fun flower I’ve ever made. I was telling my daughter, Theresa I didn’t have any Flower Soft for the center of a Sunflower I had made so I had an “AHHA” moment and used what I had at the time, Fresh Coffee grounds. I put a little glue in the center of the flower & then added coffee grounds & it works great !!! I’m SURE it’s not acid free but then I do this for fun so once in awhile you just do what you gotta do, right !! While I was telling my daughter about the coffee grounds I used for Flower Soft she suggested I try making a flower out of a coffee filter. Hummmm, certainly worth giving it a try so I grabbed a couple clean filters, poured a little coffee in a bowl, crumbled the filter up & let it sit for a few minutes then turned it over & let it dry. Did it a couple more times till it was the color I wanted & it had some nice lines of darker colors on it. After it dried well I straightened it out & used the Cheery Lynn Daisy Strip die to cut the flowers & then just off set them a bit & popped a pretty pearl brad thru it to make it secure. I love how it turned out & think they make great accents on a project. I was on a roll & had the coffee grounds out & was using more filters & made a fresh pot of coffee to soak more filters for flowers.
My husband looked over & grinned & asked if there was going to be any coffee left for breakfast.. I saved him a little !!! hehe


Here’s a close up of the adorable little gardener out harvesting & one of the Spikey flowers I made with another Cheery Lynn die from the “Build a Flower” #1 set. I LOVE these flowers, you just run the die thru a couple of times & you have enough to make several flowers using the different layers it cuts out. It also cuts a lot of different leaves but the one I used with this flower is another new Cheery Lynn die, a Flourish Leaf Strip that cuts & embosses 5 or 6 leaf branches out at a time. I also used a couple of Tiny tags nested together & a cute little bee but then decided the bee looked out of proportion with everything else on my card so pulled it off & then to my dismay it pulled a big chuck of my pretty designer paper that I had printed off.

Soooo I did what us card makers do & tried to cover up my mistake … Should have just put a couple of flowers on & called it good cuz after I started gluing flowers & little dragonflies & tiny pearls on it became toooo busy but by then it was too late. I was not about to try taking those off so like my daughter, Bridgette says, “it is what it is” … It’s just a card & I did have fun making this & do love these sweet little Paper Shelter digi images they give us to play with …
I’m always so pleased to know you stopped by.
Hugs, Janie
Thursday, September 13, 2012
Happy Summer
I know summer is drawing to an end but I just love this sweet “Garden Tilda” & wanted to use her today … She was colored with Copics & made with a whole lot of love … I made the little wood minitures & card display rack while I was working ... I am sooo NOT a wood worker but my "boss, who is a quadraplegic" can tell us how to do thse things & he maks it fun to turn a little piece of wood into a tiny wagon wheel or wood vase with his tools. Although he can't do them himself anymore he's a wonderful teacher & I'm so pleased when I look at the finished project & can say "I did this myself !!! Sure couldn't have done it without him tho. Thanks Al ...
Darlene from Dutch Paper Crafts asked me to do a few more samples for her & the die I backed Miss Tilda with is a LifeStyle Craft oval die … They are so nice to use & cut like butter. I stamped the sentiment on one of the 3 Memory Box Puffy Clouds that come as a set that Darlene also sent & used a leafing pen to make a little “silver lining” on the clouds … 
I added a little Flower Soft for the “dirt” & the watering can is an old Sizzix die I cut out of a Pepsi can & then ran thru my Vagabond & crimped it with a wavy paper crimper. The flowers are Wild Orchid Crafts & the little cones are from my “gathering” outside. I LOVE to use things I find for little fillers … The leaves are a Cheery Lynn Flourish … Gee, I sound like a salesman but I truly do love this crazy “addiction” hobby & just like to share what makes me happy.
And the inside done to match .. Looks like I forgot to add a little something to the right side of the sentiment but will fix it later. The papers are from the Nitwits “Petal Fresh” digit collection & I can’t believe how wonderful they print out. These beautiful “quilt” papers are some of my favorites …
There, I added a little Cheery Lynn butterfly to fill in the blank space …
The wonderful scalloped card base was sent to me by a sweet lady Eileen from "across the pond" ... She makes some amazing cards so go check out her blog when you have time. But I WARN you she uses some wonderful dies that makes you want to rush right out & pick some up. If you stop by to "visit" her tell her Janie says Hi ...
I wanted to use pale yellow filler flowers but only had white so I got out my nifty little Mini air compressor & a Copic marker & sprayed them to match. Quick & easy !!!


From white to yellow with just with a quick spray … I also sprayed a few leaves for another project. 
Here’s a couple more samples I did for Darlene using the Life Style Crafts Floral Doily & the Nesting Squares & Cheery Lynn butterflies & Olive branch... when I order from Dutch Paper Crafts, Darlene usually gets it to me in about 2 days. Fastest service possible. If you don’t see something you want just e-mail her & she will get right back to you & let you know if she can get it. 

This was a little long but I hope you enjoyed the post half as much as I did making it.
Hugs & happy crafting, Janie
Wednesday, February 15, 2012
Decorated Letters for MASON


I used a digi image from Saturated Canary called “Ice Cream & Pickles” & couldn’t have found a more perfect stamp for a young ladies 1st baby. I colored her with Copics & then decided to paper piece her clothes to match the papers in the card … That beautiful ribbon was a gift from my sweet friend Sharon Caudle & I made the bow using a Bow maker that I made myself out of a pine board & a few shop tools. I saw one on Becca Feekins blog months ago but wanted to try making my own. It works great & really is like having another pair of hands.
I’ve never tried decorating letters but it was pretty easy & lots of fun. I’m afraid I went overboard on the embellishments but I couldn’t stop adding little ducks & buttons & bows. I want to remind her to not hang it to close to his crib cuz there’s a lot of tiny pieces that I sure don’t want to fall into his bed.

This is how plain they were before I added anything.

This is what they look like after ….


I took pictures during the process so I could do a little picture tutorial next time I want to make them …
Here is the card my daughter, Theresa (Ashley’s Mom) made using the same digi image while she was here visiting … Isn’t it adorable !!! A truer sentiment was never made …. Love how she finished it on the inside too …


Thanks for stopping by today to see what occupies my time & makes me happy …
I’m entering this in these challenges
http://abc-challenge.blogspot.com/ for "Jazz it up"
http://digitaltuesdaychallenge.blogspot.com/ for "use your stash"
http://onestitchatatimechallenge.blogspot.com.au/ "Anything goes"
http://thepixiecottage.blogspot.com/ "Anything but a card" Masons decorated letters
http://sirstampalotchallenge.blogspot.com.au/ "in the garden
Cute Card Thursday "flower power"


.jpg)


.JPG)


