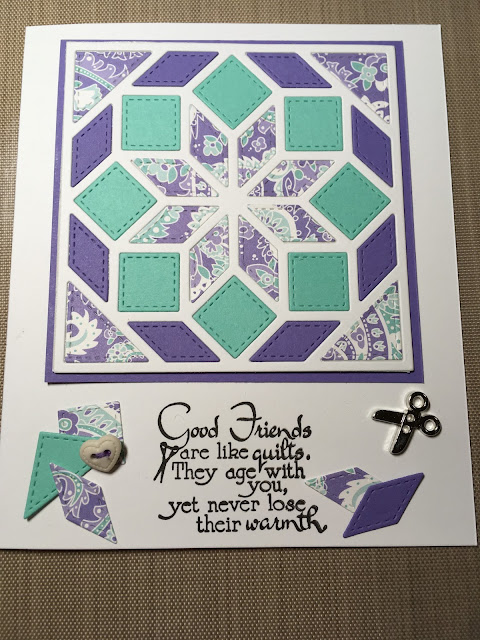
Good morning, friends & daughters & my dear husband, Jay who still loves me after all the money I've spent to continue this crazy hobby of mine. This is the first of many Quilt cards I'm sure I will be making. They are an addiction in themselves but so much fun & although they look quite difficult they are pretty simple to make. I added a button to the middle before I sent this one off to my good friend Ruth Ann for a late birthday.
Here's a sample of how I "made my quilt"...
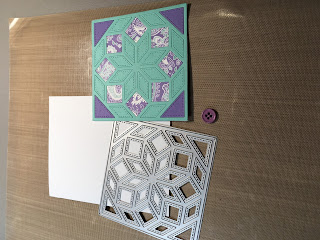
I started by choosing 3 or 4 solids & print patterned paper, placed the die on top of each paper & once I had them all cut out by just one pass thru the die cutting machine. I chose the color over lay I wanted to use & started designing my quilt. It's SOOOO much fun & brought great joy to me.
I was trying to figure out how to glue all those tiny pieces inside my quilt square when I remembered watching Pam Sparks tutorial on using the Score-Tape. She is AMAZING... I cut a 4 x 4 inch piece of white card stock, placed it on my desk then put any color of the quilt block on top of that. Then begin inserting my tiny quilt pieces into the design using colors I liked best. Once I could see what I liked or wanted to change it was easy to pop any of the pieces out & rearrange them since they weren't glued down yet.
Choose any color you want.
The finished card
Now that I have the pattern, colors & design to my liking I take a new 4x4 square of white paper (or any color you want) lay it down & use Scor-Tape to cover the whole white square so it's all sticky. I used 2 strips of 2" Scor-Tape and gently place a 4x4 paper quilt die-cut onto the sticky paper & you have your "puzzle layout" .... Use a Bone Folder to press it smoothly avoiding the sticky areas.
Now you're ready to finish your design.
Sorry this was a little picture heavy but it's been a long time since I've posted & I have a lot to relearn
Thanks for staying with me this long. I appreciate each & everyone of my viewers.
Hugs, Janie


.jpg)


.JPG)


Wow Janie, what a beautiful creation you made! Anyone who receives your card will be amazed at how much love you put into your card design, thanks for sharing your process. Wishing you and your family Happy Holidays!
ReplyDeleteThanks Shirley, these are lots of fun to make although the first one was a little time consuming.... But my friend Ruth Ann is an avid quilter & she appreciated the love that went into creating it for her... Thank you for your comment, I really appreciate it. Been a long time since I’ve posted on here.
DeleteBeautiful card Janie. Love the colors and papers. Love the sentiment too. Thanks for sharing.
ReplyDeleteHope you had a wonderful Christmas and the start of a Happy New Year.
Thank you so much for the detailed article.Thanks again.
ReplyDeletehttps://www.cekaja.com/info/perbedaan-gangguan-jiwa-dan-gangguan-mental/
ReplyDeleteI love the idea and creativity behind these quilt cards.
ReplyDelete